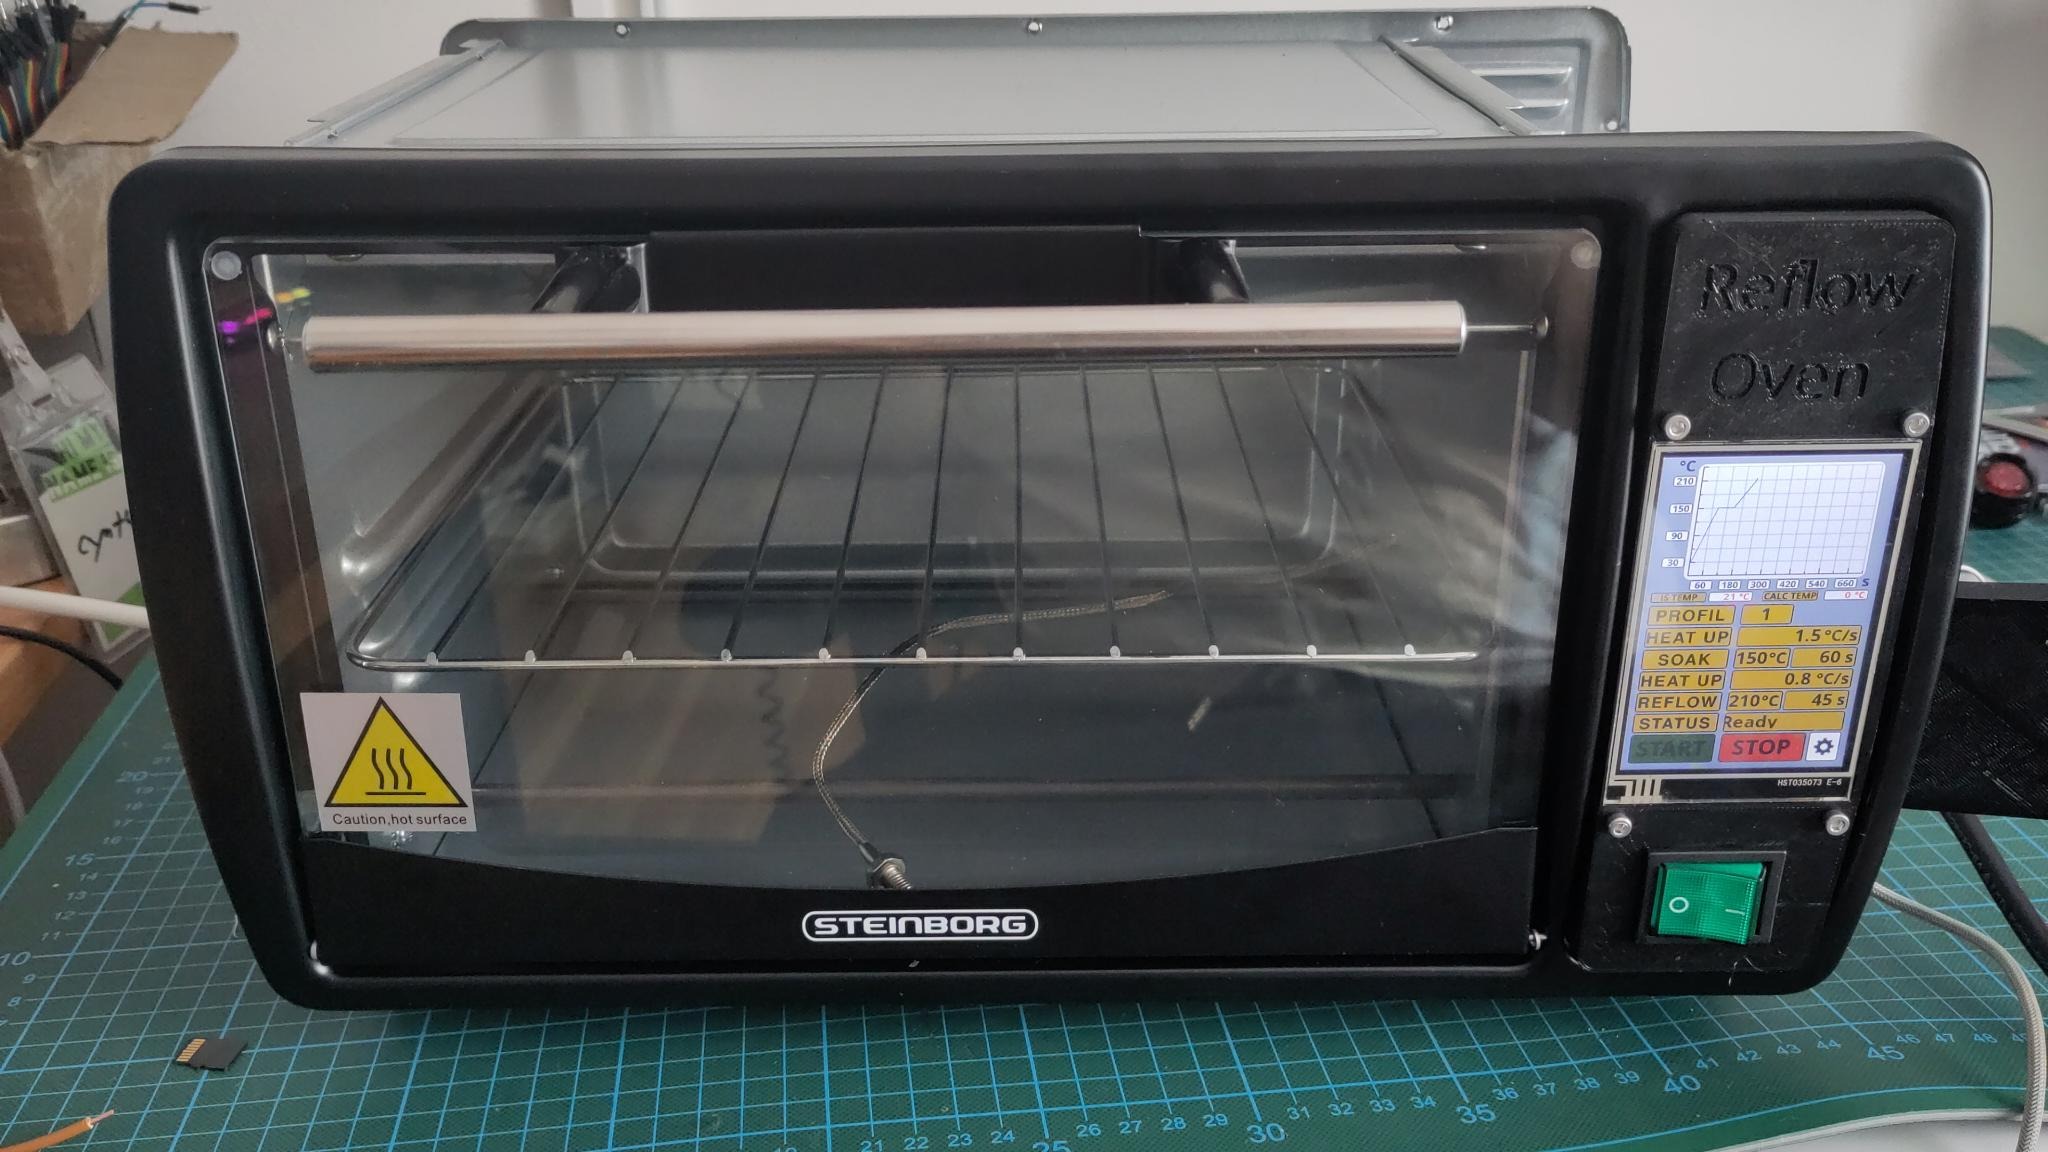
Building a Reflow Oven
Introduction
I noticed a limited availability of well-functioning reflow ovens for home soldering. These ovens often lack essential features, such as the ability to save multiple solder profiles for various types of solder paste. This sparked the idea of creating an open-source, easy-to-build oven.
Prerequisites
For the reflow oven you need obviously multiple hardware components for the build. It is also advantageous to have a soldering iron and other tools.
There is the list of the BOM of the used components.
| Part Name | Quantity | Source 1 | Source 2 | Price |
|---|---|---|---|---|
| Pizza Oven | 1 | amazon | 42 EUR | |
| Wemos D1 ESP32 | 1 | ebay | 8 EUR | |
| MAX6675 | 1 | ebay | 7 EUR | |
| Voltage shifter | 1 | ebay | aliexpress | 5 EUR |
| Nextion 3.5” 480x320 HMI | 1 | ebay | aliexpress | 44 EUR |
| SSR-25DA Solid State Module | 1 | ebay | aliexpress | 7 EUR |
| Main Switch | 1 | ebay | 5 EUR | |
| Breadboard board | 1 | ebay | 5 EUR | |
| Pin headers male x20 | 1 | no specific shop | 2 EUR | |
| Pin headers female x6 | 2 | no specific shop | 2 EUR | |
| Cables | multiple | hardware store | 10 EUR | |
| Screws | multiple | hardware store | 2 EUR |
For cables and screws there is not exactly a fixed BOM. You need three wires for AC and additional wires for DC voltage.
Build
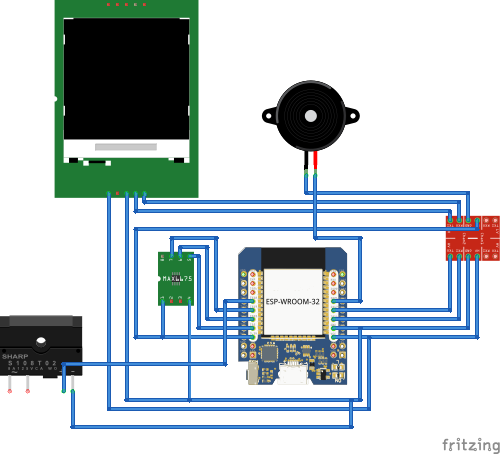
For the build you can use the following schematic to construct your specific PCB using a breadboard. The schematic is drawn in Fritzing but can also be designed using KiCad or other PCB designer tools.
The result after soldering the PCB is the following:
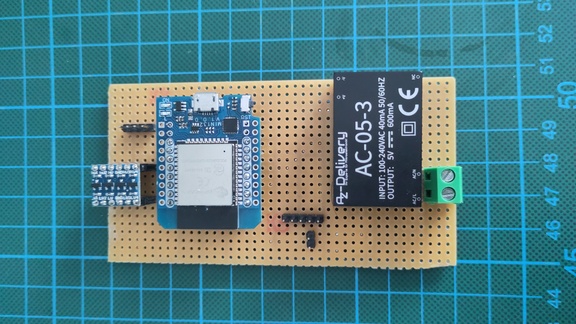
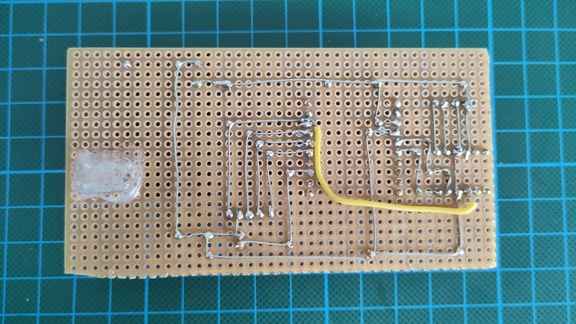
You can build your PCB however you want. You do not need to follow my exact pictures.
After soldering and building the PCB, you need to print a front cover panel. Therefore a 3D printer is an advantage.